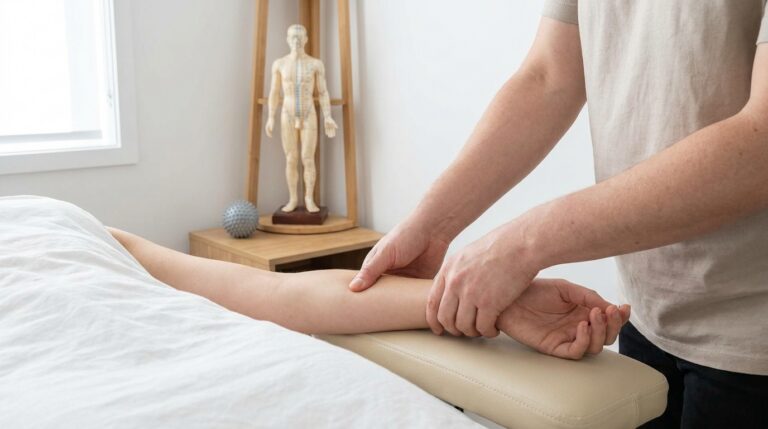
Acupressure self massage is one of the simplest ways to support your body between appointments, during a stressful day, or when you need relief and only have your hands. It uses steady finger pressure on the same points used in acupuncture, but without needles. When done correctly, many people find it helpful for everyday discomfort, pressure points for anxiety, nausea, and winding down at night.
This guide is designed to be practical and competitive with what you see online, with clear step-by-step routines, point location cues, common mistakes to avoid, and troubleshooting when acupressure does not work the first time. You will also find expanded safety guidance and condition-specific FAQs.
Quick Start: 3 Simple Acupressure Routines (5 to 10 Minutes)
If you only read one section, start here. Each routine lists the exact sequence, hold times, and total time. Use moderate pressure unless stated otherwise, and work both sides for any point that is not on the midline.
Routine 1: Headache Reset (Tension or Screen-Strain) (5 minutes)
- GB20 (base of skull), 60 seconds
- LI4 acupressure point (hand), 60 seconds each side
- Yintang (between eyebrows), 60 seconds
Total: about 5 minutes.
Routine 1B: Headache Reset (10 minutes, stronger option)
- GB20, 90 seconds
- LI4, 90 seconds each side
- LV3 (top of foot), 60 seconds each side
- Yintang, 60 seconds
Total: about 9 to 10 minutes.
Routine 2: Stress Reset (Pressure Points for Anxiety) (5 minutes)
- CV17 (center of chest), 90 seconds
- P6 (inner wrist), 60 seconds each side
- Yintang, 60 seconds
Total: about 5 minutes.
Routine 2B: Stress Reset (10 minutes, deeper downshift)
- CV17, 2 minutes
- P6, 90 seconds each side
- LV3, 60 seconds each side
- Yintang, 60 seconds
Total: about 9 to 10 minutes.
Routine 3: Sleep Wind-Down (Acupressure Points for Sleep Tonight) (5 minutes)
- Yintang, 90 seconds
- CV17, 60 seconds
- KI1 (sole of foot), 45 seconds each foot
Total: about 4 to 5 minutes.
Routine 3B: Sleep Wind-Down (10 minutes, for wired-tired nights)
- Yintang, 2 minutes
- P6, 60 seconds each side
- CV17, 2 minutes
- KI1, 60 seconds each foot
Total: about 9 to 10 minutes.
Quick routine for waking in the middle of the night (3 to 5 minutes)
- Yintang, 60 seconds (very light pressure)
- P6, 45 seconds each side
- CV17, 60 seconds
Tip: Keep the room dark, avoid checking your phone, and use lighter pressure than you would during the day.
Main Highlights
- Acupressure self massage uses firm, steady pressure on acupuncture points, with no needles and minimal equipment.
- People commonly use acupressure points for pain relief, acupressure points for stress, nausea, and sleep support.
- This article includes exact timing, sequence, and technique cues for common goals, including acupressure points for headaches and acupressure points for sleep.
- Each point below follows a consistent template so you can scan quickly and use it correctly.
- Acupressure is generally low risk for healthy adults, but there are important contraindications and red flags listed below.
What Is Acupressure Self-Massage?
Acupressure self massage is a hands-on technique where you press specific points on the body, usually with a thumb, finger pad, knuckle, or a soft tool. The points used are the same locations used in acupuncture and are traditionally mapped along meridians, but you do not need to understand the full meridian system to use acupressure safely and effectively at home.
Most people use acupressure as a self-care strategy for:
- Everyday aches, tightness, and acupressure points for pain relief
- Feeling keyed up, overwhelmed, or using pressure points for anxiety
- Sleep onset trouble and acupressure points for sleep
- Nausea, including motion sensitivity, often using the P6 acupressure point for nausea
- Head and neck tension using acupressure points for headaches
How Acupressure Works (Simple Physiology + What You Should Feel)
Acupressure is often described in traditional terms, but it also fits within modern, simple physiology. When you press a point steadily:
- You stimulate local pressure and touch receptors in skin and muscle.
- You may reduce protective muscle guarding in nearby tissue.
- You can influence how the nervous system interprets input, which may change pain sensitivity and perceived tension.
- Slow breathing paired with pressure can support a calmer state by shifting toward parasympathetic activity.
What you should feel: a strong pressure, ache, heaviness, warmth, or a “good hurt” sensation is common. You might also feel a subtle referred sensation along the limb (for example, LI4 can feel like it radiates into the hand). Sharp pain, numbness, tingling, or electric sensations usually mean you should reduce pressure or change your angle.
Acupressure vs. Acupuncture vs. Massage Therapy
- Acupuncture: uses sterile, single-use needles inserted by a licensed professional. It can reach deeper layers and is often more targeted for complex patterns.
- Acupressure: uses finger pressure on the same points. It is generally gentler and ideal for home use.
- Massage therapy: tends to focus on broader areas (muscle, fascia, circulation) rather than point-based stimulation, although many therapists also use trigger points and acupressure-style holds.
How to Do Acupressure Correctly (Pressure, Time, Breathing, Position)
1) Pressure: firm, not forceful
Aim for 5 to 7 out of 10 intensity. You want “comfortably uncomfortable,” not sharp or alarming pain. For facial points (like Yintang) and chest points (like CV17), use a lighter touch, often 3 to 5 out of 10.
2) Time: hold longer than you think
Most people rush. A good default is 60 to 120 seconds per point. If you only do 10 to 20 seconds, you may not give the tissue and nervous system time to respond.
3) Breathing: long exhale
Try inhale 4 seconds, exhale 6 to 8 seconds. Longer exhales often help your body downshift more quickly.
4) Position: get the point, then relax around it
- For neck points like GB20, keep your jaw unclenched and shoulders down.
- For wrist points like P6, keep your forearm supported so you do not fight your own muscles.
- For foot points like LV3 and KI1, sit so your ankle is relaxed and not flexed hard.
5) Left and right variations
In acupressure, one side is often more tender. That is normal. Work both sides, but consider starting on the more tender side with slightly lighter pressure, then match the other side.
Point Finder Tips (How to Know You’re in the Right Spot)
Competitors often show diagrams, but you can “map” points accurately using feel. Use these tips:
- Tenderness check: Many effective points feel more tender than surrounding tissue.
- Dense feel: The right spot can feel slightly thicker or ropey, like a small “knot” under the skin.
- Referred sensation: A correct point sometimes creates a spreading ache (not sharp pain).
- Micro-adjustments: If nothing happens, move 1 to 2 cm in any direction and re-check.
- Reduce pressure first: If the area feels numb or you have reduced sensation, lighter pressure can help you detect the spot more safely.
- Try the other side: If the right side is not tender, the left might be, and vice versa.
Rule of thumb: You do not need extreme pain to “activate” a point. Consistent, well-aimed pressure for 60 to 120 seconds usually works better than pressing as hard as possible.
Rule of thumb: You do not need extreme pain to “activate” a point. Consistent, well-aimed pressure for 60 to 120 seconds usually works better than pressing as hard as possible.
See a Thrive clinician
Acupuncture, dry needling and physical therapy across four Long Island offices. Same-week appointments are usually available, and you do not need a referral to start.
8 Acupressure Points You Can Use at Home
Below are eight of the most useful points for home routines. Each point is presented with the same mini-template for easier scanning.
1) LI4 (Hegu) (LI4 acupressure point)
Best for: acupressure points for headaches, jaw tension, neck tightness, and general pain modulation (often included in acupressure points for pain relief routines).
Location cues: On the back of the hand, in the web space between thumb and index finger. Bring thumb and index finger together, find the highest point of the bulge, then relax the fingers and press there.
Pressure direction: Press straight in toward the center of the hand. A slight angle toward the index finger bone often feels more “on target.”
Hold time: 60 to 120 seconds.
Repeat: Both sides, 1 to 3 rounds daily as needed.
Common mistake: Pinching the webbing too superficially. Fix it by moving slightly onto the fleshy mound and pressing inward, not squeezing skin.
Important note: Avoid LI4 in pregnancy unless your licensed clinician specifically instructs you otherwise.
2) GB20 (Fengchi)
Best for: tension-type headaches, neck strain from screens, “tight band” headaches, and stiffness at the base of the skull.
Location cues: At the base of the skull under the bony ridge, in the hollows on either side of the spine where neck muscles meet the skull.
Pressure direction: Press upward and slightly inward toward the center of the head, not straight forward into the throat.
Hold time: 60 to 120 seconds.
Repeat: Once, then reassess. If helpful, repeat a second round.
Common mistake: Poor neck position. Fix it by slightly tucking the chin, relaxing the jaw, and keeping shoulders down. Avoid cranking the head back.
3) ST36 (Zusanli)
Best for: energy support, digestion support, and recovery when you feel run down. Often used in broader acupressure points for pain relief and resilience routines.
Location cues: About four finger-widths below the bottom of the kneecap, one finger-width to the outside of the shinbone, often in a small muscular depression.
Pressure direction: Press straight back into the muscle, not into the shinbone.
Hold time: 60 to 120 seconds.
Repeat: Both sides, once daily, or up to twice daily during travel, stress, or fatigue.
Common mistake: Pressing on the edge of the tibia (shinbone). Fix it by sliding slightly outward into the softer muscle tissue.
4) Yintang
Best for: acupressure points for stress, quieting the mind, and acupressure points for sleep, especially trouble falling asleep.
Location cues: Between the eyebrows, centered just above the bridge of the nose.
Pressure direction: Light, steady pressure inward. You can also use very small circles if that feels better.
Hold time: 60 to 120 seconds.
Repeat: Once in the evening, and again if you wake at night.
Common mistake: Pressing too hard and creating a headache. Fix it by using lighter pressure and slowing your exhale.
5) KI1 (Yongquan)
Best for: grounding, restless body sensations, and acupressure points for sleep when you feel “wired-tired.”
Location cues: On the sole of the foot, in the depression that appears when you curl the toes, about one-third of the distance from the base of toes toward the heel.
Pressure direction: Press upward toward the center of the foot, not sliding toward the toes.
Hold time: 45 to 120 seconds per foot.
Repeat: Once nightly. If you wake overnight, do a shorter, lighter version.
Common mistake: Rubbing quickly instead of holding. Fix it by planting the thumb and waiting for the sensation to soften.
6) P6 (Neiguan) (P6 acupressure point for nausea)
Best for: nausea, motion sensitivity, anxious stomach, and waves of chest or throat discomfort that can come with stress. It is one of the most searched acupressure points and commonly used as a pressure point for anxiety with a physical component.
Location cues: On the inner forearm, about two to three finger-widths above the wrist crease, centered between two prominent tendons.
Pressure direction: Press straight down between the tendons. If you press directly on a tendon, it can feel sharp or slippery.
Hold time: 60 to 120 seconds per side.
Repeat: As needed, up to several times daily during active symptoms.
Common mistake: Pressing on the tendon. Fix it by moving slightly toward the center gap, reducing pressure, and pressing straight down.
7) CV17 (Shanzhong)
Best for: acupressure points for stress, pressure points for anxiety with chest tightness, shallow breathing patterns, and emotional overwhelm.
Location cues: Midline of the breastbone, roughly level with the space between the nipples for many adults.
Pressure direction: Gentle inward pressure. This area is sensitive, so lighter is usually better.
Hold time: 60 to 120 seconds.
Repeat: Any time, especially before a meeting, after an argument, or when you notice breath-holding.
Common mistake: Pressing too hard and tensing the chest. Fix it by backing off to 3 to 4 out of 10 intensity and lengthening your exhale.
8) LV3 (Taichong)
Best for: irritability, jaw clenching, stress tension patterns, and some headaches. Often paired with LI4 as the “Four Gates” combination for general tension.
Location cues: Top of the foot, in the space between the first and second metatarsal bones, about 1.5 to 2 finger-widths above the toe webbing.
Pressure direction: Press downward and slightly toward the space between the bones.
Hold time: 60 to 120 seconds per foot.
Repeat: Once daily, often in the evening. Up to twice daily during high stress.
Common mistake: Staying too close to the toe webbing. Fix it by moving up the foot until you feel a more responsive, tender spot.
Self-massage is a good place to start, and it works well next to hands-on care when one point stays stubborn. You can read what a session with a practitioner involves on our acupressure page.
How to Combine Points by Goal (Headache, Stress/Anxiety, Sleep, Nausea, Digestion, Recovery)
Acupressure points for headaches: choose the routine by headache type
Tension headache (band around the head, neck tightness):
- GB20, 90 seconds
- LI4, 60 to 90 seconds each side
- Yintang, 60 seconds
Optional add-on: LV3, 60 seconds each side if you feel irritable, clenched, or “wound up.”
Migraine pattern (throbbing, light sensitivity, nausea):
- P6, 90 seconds each side (especially if nausea is present)
- Yintang, 60 to 120 seconds (light pressure)
- GB20, 60 seconds (lighter than usual, stop if it aggravates)
Note: Acupressure may support comfort during a migraine for some people, but it is not a substitute for medical evaluation and an individualized migraine plan.
Neck strain from screens (tech neck):
- GB20, 90 seconds
- LI4, 60 seconds each side
- CV17, 60 seconds (to reset breathing and reduce upper chest tension)
Technique tip: Do this with your back supported, shoulders relaxed, and chin gently tucked.
Acupressure points for stress and pressure points for anxiety
- CV17, 2 minutes
- P6, 60 to 90 seconds each side
- Yintang, 60 seconds
Optional add-on: Four Gates (LI4 + LV3), 60 seconds each side, if you feel “stuck” tension, irritability, or restlessness.
Acupressure points for sleep: adjust to your sleep problem
Difficulty falling asleep:
- Yintang, 2 minutes
- CV17, 2 minutes
- KI1, 60 seconds each foot
Waking in the middle of the night with a racing mind:
- Yintang, 60 seconds (very light)
- P6, 45 seconds each side
- CV17, 60 seconds
Waking with body tension or clenched jaw:
- LV3, 60 seconds each foot
- LI4, 60 seconds each side (skip in pregnancy)
- Yintang, 60 seconds
P6 acupressure point for nausea (travel, motion sensitivity, uneasy stomach)
- P6, 2 minutes each side
- CV17, 60 seconds (if anxiety or tight breathing is present)
Tip: Use steady pressure and keep your eyes on a stable point if you are motion sensitive.
Digestion support (general, non-urgent discomfort)
- ST36, 2 minutes each side
- P6, 60 seconds each side
Reminder: Severe abdominal pain, fever, persistent vomiting, blood in stool, or worsening symptoms need medical evaluation.
Recovery day routine (general heaviness, post-exertion fatigue)
- ST36, 2 minutes each side
- LV3, 60 seconds each side
- CV17, 60 seconds
Common Mistakes and Troubleshooting
Common mistakes (and how to fix them)
- Too much pressure: If you brace, hold your breath, or feel sharp pain, you are pressing too hard. Fix it by dropping to 4 to 6 out of 10, then holding longer.
- Rubbing instead of pressing: Fast rubbing often irritates skin and does not create the same response. Fix it by using a steady hold, or very small circles without sliding.
- Holding too briefly: Many people quit at 10 seconds. Fix it by committing to 60 seconds minimum, then reassessing.
- Poor posture during GB20: Cranking the neck back can compress sensitive tissues and worsen symptoms. Fix it by supporting your elbows, keeping a gentle chin tuck, and pressing upward, not forward.
- Pressing on tendons for P6: Tendon pressure feels sharp and “stringy.” Fix it by moving into the groove between tendons and pressing straight down with moderate intensity.
Troubleshooting: when acupressure doesn’t work
If you try a point and feel nothing, or symptoms do not change, use this checklist:
- No tenderness anywhere: Move 1 to 2 cm around the landmark, lighten pressure, and re-check. Some people respond better to gentle pressure, especially on the face and chest.
- Pain increases during pressing: Stop, reduce pressure, and adjust angle. If sharp pain persists, skip that point and try another supporting point (for headaches, swap LI4 for Yintang and CV17).
- Symptoms rebound after a short improvement: You may need longer holds (90 to 120 seconds), a second round, or a better point combination. For example, for stress, pairing CV17 with P6 often works better than either alone.
- You feel lightheaded: Stop, sit, hydrate, and try again later with lighter pressure and slower breathing. Avoid pressing while standing if you tend to feel faint.
- You can’t relax into the point: Change position, support your arm or foot, and unclench your jaw. Muscular bracing can blunt the effect.
Safety, Precautions, and When to Avoid Points
Acupressure is generally low risk, but it is still a body-based intervention. Use these precautions, and when in doubt, ask a qualified clinician.
Stop and seek medical care now if you have:
- Sudden, severe headache, especially “worst headache of your life,” or headache with fever, stiff neck, fainting, or confusion
- New neurologic symptoms such as weakness, facial droop, difficulty speaking, new numbness, or vision changes
- Chest pain, chest pressure with shortness of breath, sweating, nausea, or pain radiating to arm or jaw
- Severe abdominal pain, persistent vomiting, or signs of dehydration
- Head injury followed by worsening headache, vomiting, or confusion
Use extra caution or avoid acupressure in these situations
- Pregnancy: Avoid LI4 (and other traditionally contraindicated points such as SP6 and BL60) unless guided by a licensed professional.
- Blood thinners or bleeding disorders: Use gentle pressure and shorter holds. Stop if you bruise easily.
- Neuropathy or reduced sensation: If you cannot feel pressure well (for example with diabetic neuropathy), avoid deep pressing because it increases risk of bruising or tissue irritation.
- Recent fracture, sprain, or surgery: Do not press near the injured area or on fresh scars unless cleared by your clinician.
- Implanted devices or medical access sites: Avoid direct pressure over port sites, pacemaker areas, and any region where you have implanted hardware close to the surface.
- Skin conditions: Avoid open wounds, rashes, infections, burns, or actively inflamed skin.
- Severe varicose veins: Do not press directly on enlarged, painful veins or areas with skin changes, warmth, or tenderness. Seek medical guidance if you suspect vein inflammation or clotting.
When to Work with a Licensed Acupuncturist
Self-acupressure can be a strong addition to your routine, but it is not a replacement for individualized care when symptoms are persistent or complex.
Consider working with a licensed acupuncturist if you have:
- Headaches that are frequent, escalating, or unclear in cause
- Ongoing insomnia beyond a few weeks, especially with daytime impairment
- Chronic neck or jaw tension (including TMJ patterns)
- Nausea that is persistent or unexplained
- Stress and anxiety symptoms that feel physical, recurrent, or hard to regulate
At Thrive Health Acupuncture, these points are often taught during sessions so patients leave with both an in-office treatment and a simple, repeatable home plan.
Frequently Asked Questions (Condition-Specific)
Does acupressure work for migraines?
It can help some people manage discomfort, nausea, and stress during a migraine episode, especially with points like P6 and calming points like Yintang. Migraine is a neurologic condition with many triggers, so acupressure is best used as supportive self-care, not as a stand-alone treatment. If migraines are new, worsening, or severe, get medical evaluation.
What are the best acupressure points for sleep tonight?
For many people, a simple sequence of Yintang, CV17, and KI1 works well. If you feel nausea, fluttery anxiety, or a tight chest, add P6. Keep pressure lighter than daytime and pair it with slow breathing.
Which pressure points for anxiety are most helpful during a panic-like wave?
CV17 (gentle pressure with long exhales) and P6 are common go-to pressure points for anxiety, especially when anxiety shows up as chest tightness, throat sensations, or nausea. If you feel dizzy or faint, sit down first and use lighter pressure.
What acupressure points for headaches should I use for tension vs. screen-related neck strain?
For tension and neck-driven headaches, start with GB20, then add LI4. For screen strain, posture matters, keep a gentle chin tuck and avoid cranking the neck back while pressing GB20. Finish with Yintang to reduce forehead tension and settle the nervous system.
What pressure points help TMJ or jaw clenching?
People often use LI4 and LV3 (the Four Gates pairing) to address whole-body tension patterns that contribute to clenching. Yintang can also help if clenching is tied to stress and racing thoughts. For persistent TMJ pain, clicking, or limited opening, consider an evaluation for bite, sleep, and neck factors.
How long should I hold an acupressure point?
A practical range is 60 to 120 seconds per point. Facial and chest points usually respond well to lighter pressure held longer. If you are short on time, even 30 to 45 seconds can help, but longer holds are more reliable.
What if an acupressure point is not tender, does that mean I’m doing it wrong?
Not necessarily. Some points are tender on one side only, and some people are less tender overall. Use the point finder tips: move 1 to 2 cm, adjust angle, reduce pressure, and try the other side. Focus on how your symptoms change, not tenderness alone.
Want help finding the right points for you?
A practitioner can look at your posture, muscle tension, and symptom pattern, then show you a short routine to repeat at home. Most people pick it up in one visit.